Google Drive Application Setup (Business Guide)
This guide walks a business administrator through creating a Google Cloud project that can authorize Sasha (or another internal application) to read from Google Drive, including Shared Drives. Every step is spelled out; if you hit anything that looks different in your environment, note it for engineering follow-up.
1. Confirm prerequisites
- You must have a Google Workspace account with permission to create projects in the Google Cloud Console. If you are not a super admin, double-check with IT that you have at least the
Project Creatorrole. - Decide whether the integration reads from individual user drives, Shared Drives, or both. Shared Drive access requires that the connecting user (or service account) is a Manager or Content Manager on each target Drive.
- Know who will own the integration long-term. That person’s Google account should create the project to avoid surprises later.
2. Create (or select) a Google Cloud project
- Open https://console.cloud.google.com/ in Chrome (Google recommends Chrome for admin workflows).
- If prompted, choose the Google Workspace account that will own the integration.
- In the top navigation bar, click the project selector (it usually shows “Select a project” or your current project name).
- Click New Project.
- Enter a Project name such as
Sasha Google Drive Integration. - Select your organization and billing account if prompted. (If you do not see your organization, you might not have permission— escalate to a Workspace admin.)
- Click Create and wait for the confirmation toast in the upper right.
- Click Select Project on the success toast to ensure you are working inside the new project.
3. Enable the required Google APIs
- Inside the Cloud Console, open the left hamburger menu and go to APIs & Services → Enabled APIs & services.
- Click + ENABLE APIS AND SERVICES at the top.
- In the API Library search box, type
Google Drive API. - Click Google Drive API, verify the project name at the top, and click Enable.
- Repeat the same process for
People APIonly if your integration needs to resolve user account names. (This is optional; add a note for engineering if unsure.)
4. Configure the OAuth consent screen
- Still under APIs & Services, click OAuth consent screen in the left sidebar.
- Choose Internal if all users belong to your Google Workspace domain. (If you select External, Google will require an additional verification process; only do this if you must support users outside your domain.)
- Click Create.
- Fill out App information:
- App name: e.g.
Sasha Drive Connector. - User support email: choose a monitored group mailbox (e.g.
support@yourdomain.com).
- App name: e.g.
- In App domain, populate any pages you can supply today:
- Application home page: your product’s public site (e.g.
https://sasha.yourdomain.com). - Privacy policy / Terms of service: use existing corporate policies. If these don’t exist, flag for legal to provide links.
- Application home page: your product’s public site (e.g.
- In Authorized domains, click Add domain and enter the domain that hosts your app (e.g.
yourdomain.com). Google only accepts bare domains here—no protocol. - In Developer contact information, add at least one email monitored by engineering or IT.
- Click Save and Continue.
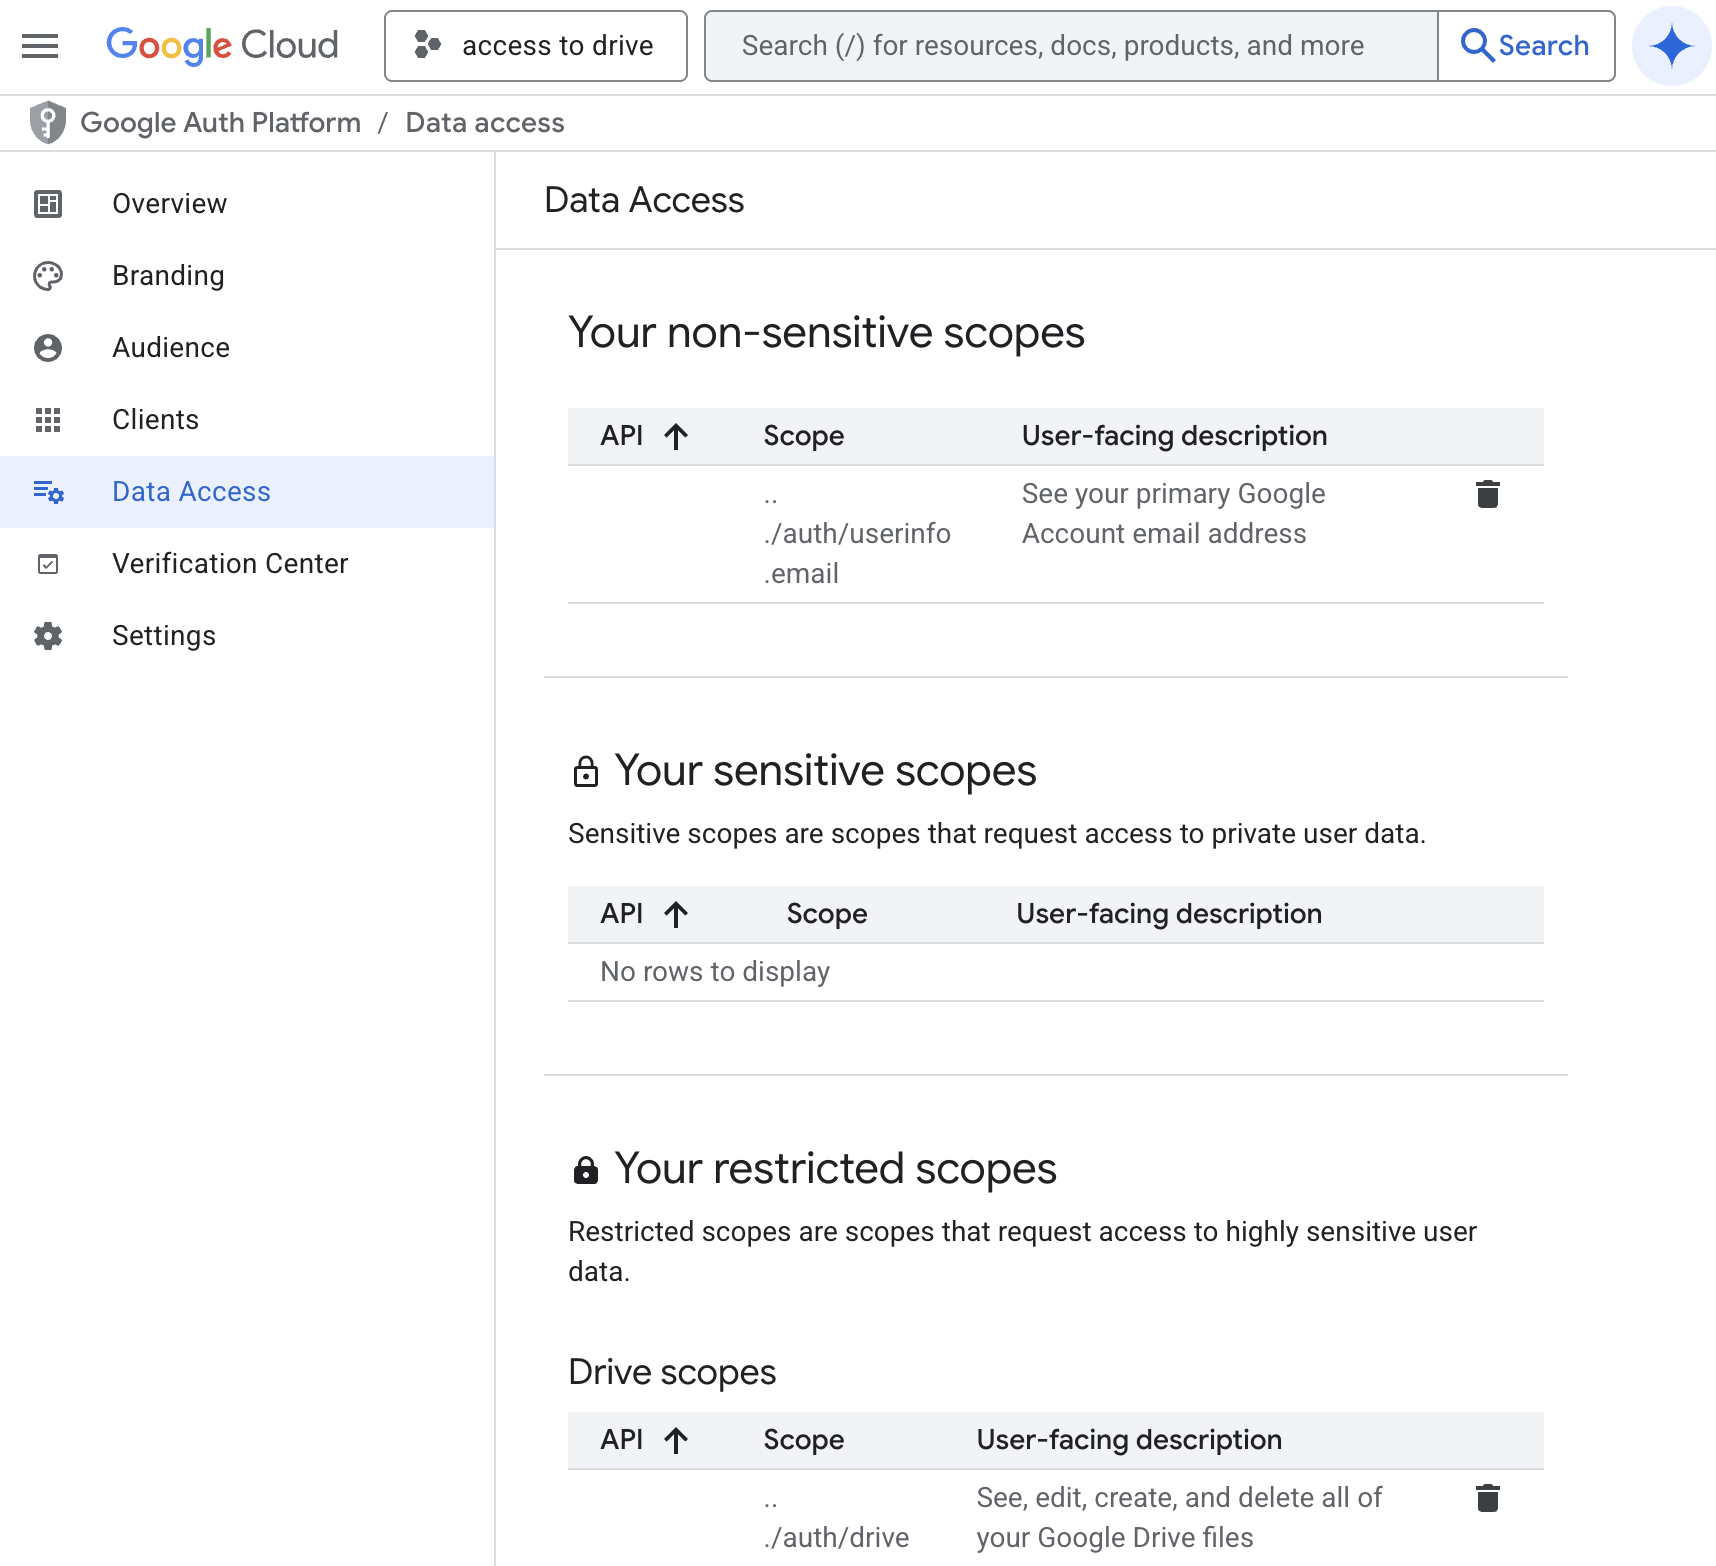
- Scopes step:
- Click ADD OR REMOVE SCOPES.
- Search for
../auth/drive. - Check the scope
https://www.googleapis.com/auth/drive(full drive access). If you prefer read-only access and the product supports it, choosehttps://www.googleapis.com/auth/drive.readonly. - Click Update, then Save and Continue.
- If your security policy requires least-privilege, note the chosen scope so engineering can confirm it aligns with the app’s needs.
- Test users step:
- For Internal apps, Google auto-allows everyone in your domain—leave this blank and click Save and Continue.
- For External apps (not recommended here), add the email addresses that should test before verification.
- Review the summary page and click Back to Dashboard. Status should read "In production" for Internal apps; if it says "Testing," click Publish App.
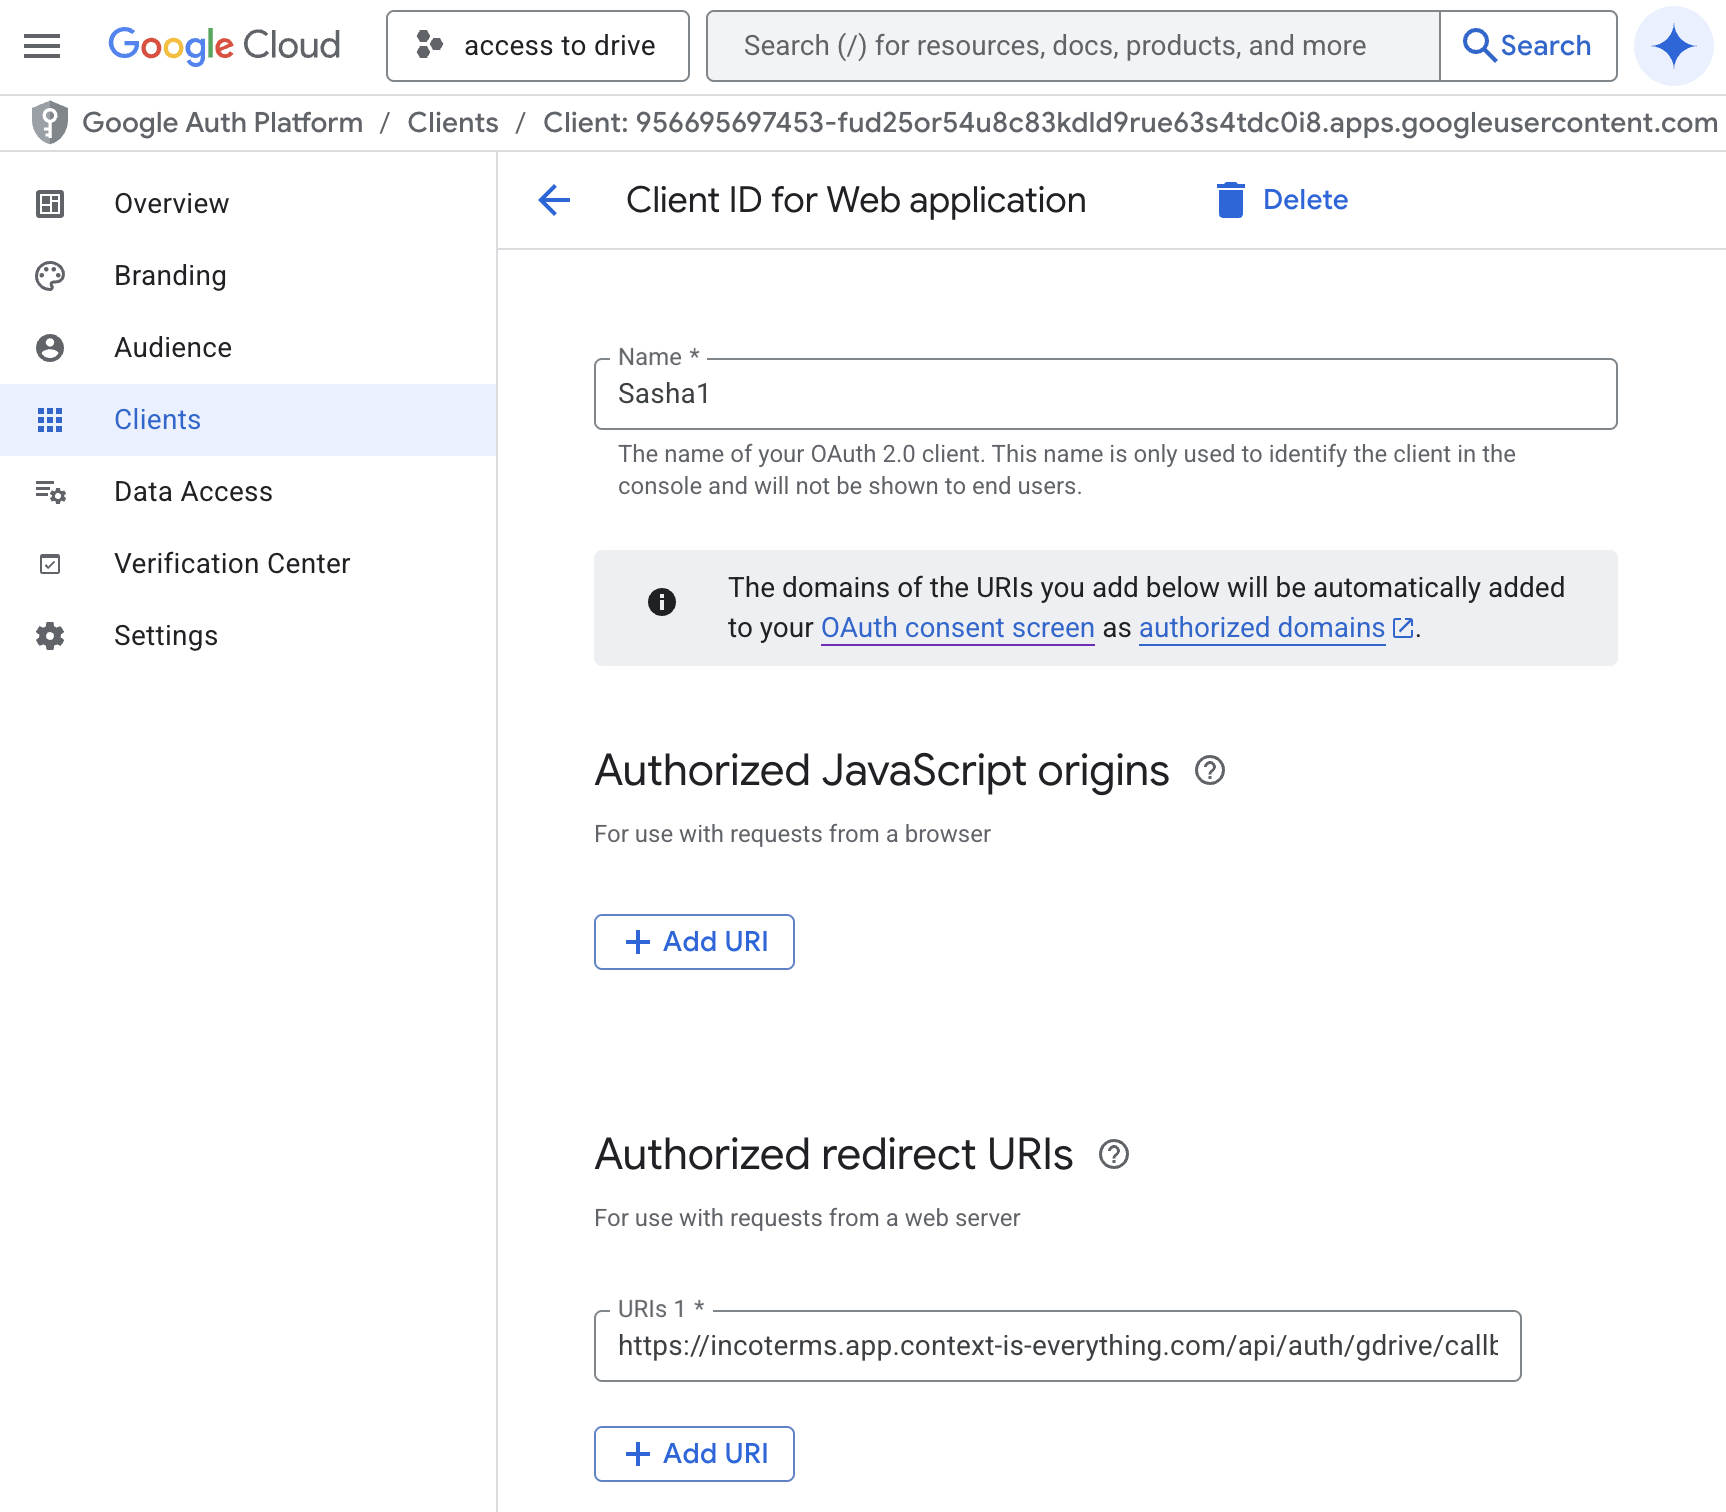
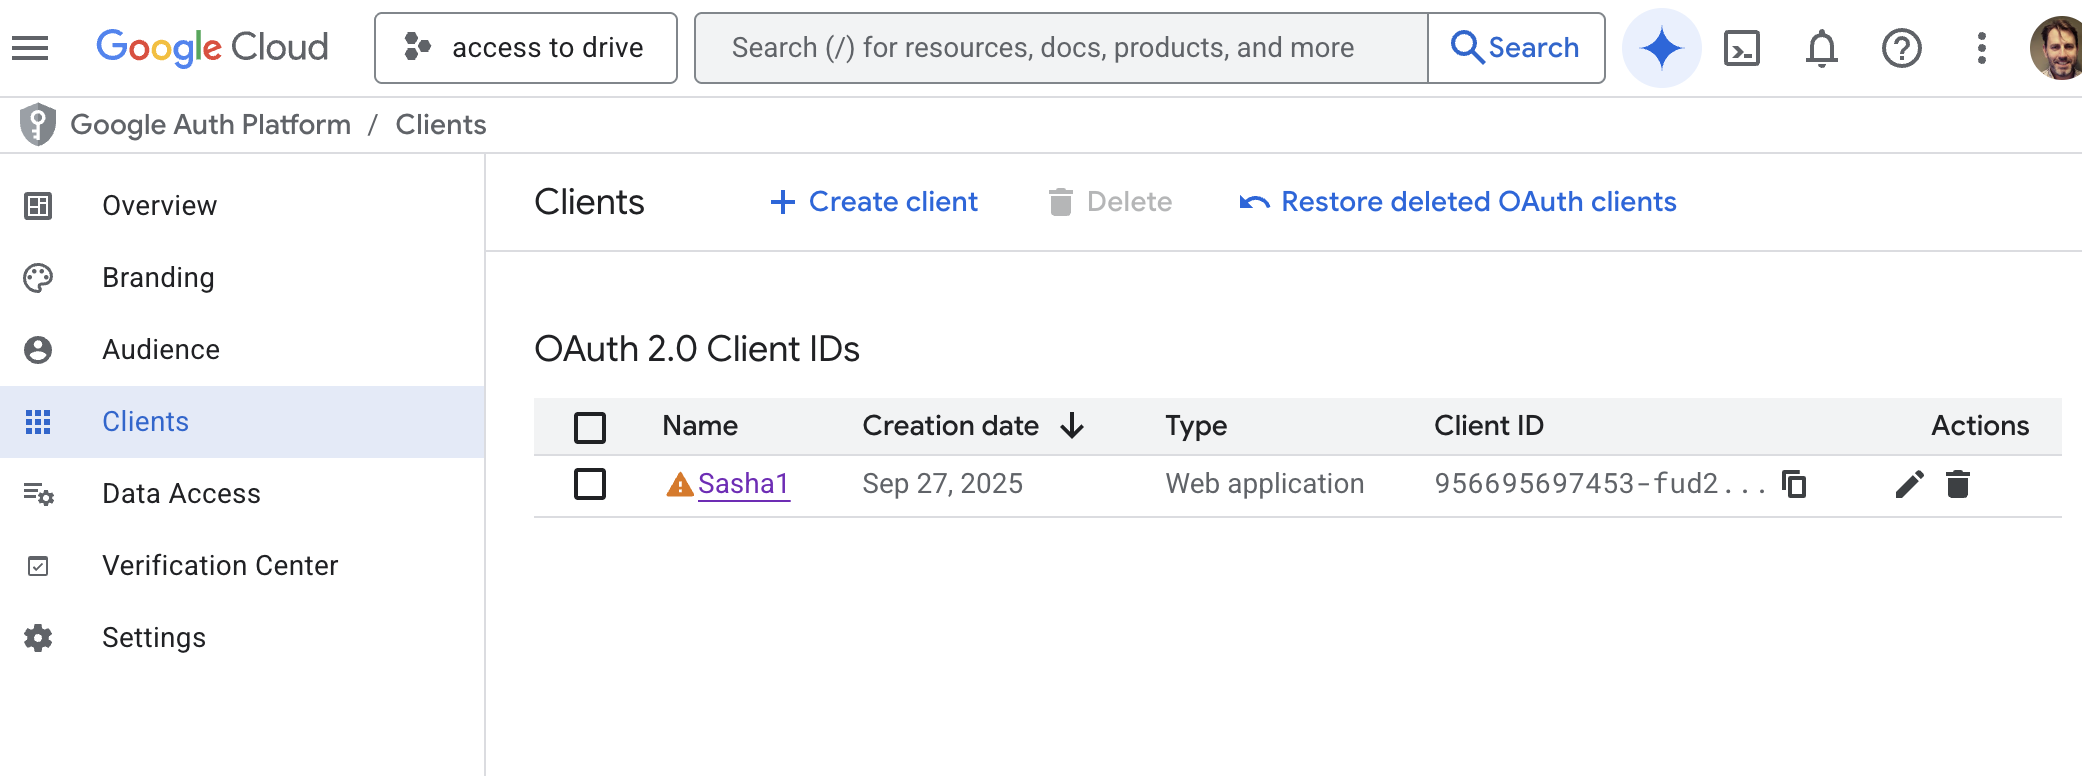
5. Create OAuth credentials
- Go to APIs & Services → Credentials.
- Click + CREATE CREDENTIALS → OAuth client ID.
- On the Application type dropdown, choose Web application (Sasha runs in a browser and needs this type).
- Enter a Name like
Sasha Web Client. - Under Authorized JavaScript origins, click + ADD URI and enter the exact domain(s) where the app is hosted (e.g.
https://studio.yourdomain.com). Use production and staging origins if both are needed. - Under Authorized redirect URIs, click + ADD URI for each callback the app expects. For Sasha's default configuration, request the exact redirect URI from engineering. ( Placeholder: "
https://studio.yourdomain.com/api/oauth2/google/callback" – confirm with engineering before saving.)
- Click Create.
- A modal will show the Client ID and Client Secret. Copy them immediately:
- Store them in your secure secrets manager (e.g. 1Password, Vault). Do not leave them in email or plain text.
- Send the values to the engineering team over the approved secure channel.
- Download the JSON file using the Download JSON button and keep it in a secure location. Label it clearly (e.g.
sasha-google-drive-oauth-client.json).
6. (Optional) Configure domain-wide delegation for service accounts
Skip this section if the integration only asks end users to log in individually.
- From APIs & Services → Credentials, click + CREATE CREDENTIALS → Service account.
- Name the service account (e.g.
sasha-drive-service) and click Create and Continue. - Assign at least the
Project → Editorrole, then click Done. - Open the new service account, go to the Keys tab, and click Add Key → Create new key → JSON. Save the key securely.
- Visit Google Workspace Admin Console (https://admin.google.com/) with a super-admin account.
- Navigate to Security → Access and data control → API controls.
- Under Domain-wide Delegation, click MANAGE DOMAIN WIDE DELEGATION.
- Click Add new and provide:
- Client ID: the numeric ID from the service account details page.
- OAuth scopes:
https://www.googleapis.com/auth/drive.
- Click Authorize. This allows the service account to act on behalf of users; coordinate with engineering to make sure this is actually needed.
7. Grant Shared Drive access
- Identify the Shared Drives that Sasha must read.
- In Google Drive (https://drive.google.com/drive/shared-drives), open each target drive.
- Click the drive name → Manage members.
- Add the Google account that will authenticate (either the human admin account or the service account email).
- Set the role to Content manager (minimum required for uploading) or Manager (full control). Choose the lowest role that still meets product requirements.
- Click Send. Repeat for each Shared Drive.
8. Share credentials and configuration with engineering
- Provide the following to engineering via the approved secure channel:
- OAuth Client ID and Secret.
- Redirect URI(s) that were registered.
- The scope(s) allowed (drive vs. drive.readonly).
- The project ID (
project-idformat is shown on the Cloud Console dashboard). - (If using a service account) the service account email and JSON key.
- Tell engineering which Shared Drives you granted access to so they can test against the correct locations.
9. Validate the integration
- Ask engineering to deploy the credentials to staging.
- Log in to the Sasha staging environment and trigger the “Connect Google Drive” flow.
- Approve the Google consent screen; ensure it mentions the app name you configured.
- After authorization, verify that files from the expected Shared Drives appear in the File Tree.
- If approval fails with a message about unverified scopes, double-check that the app type is Internal and that you published it out of testing. If using External type, Google may require additional verification— escalate to security/compliance.
10. Production checklist
- Ensure secrets are stored in the production secrets manager and not in
.envfiles committed to source control. - Confirm that Shared Drive permissions are granted to the production account (service account or admin user).
- Schedule a quarterly review to rotate the OAuth client secret if required by policy.
- Document the steps above in your internal wiki so future administrators can repeat the process.
Unverified assumptions (needs engineering confirmation):
- The default Sasha redirect URI is
https://studio.yourdomain.com/api/oauth2/google/callback. Please confirm with engineering; update the guide when the real URI is known.