Microsoft 365 Application Setup (Business Guide)
Use this checklist to create an Azure AD application that grants Sasha (or another internal product) permission to read files from Microsoft 365 (SharePoint Online and OneDrive). Each task is spelled out for a business admin; flag anything that differs in your tenant so engineering can adjust.
1. Confirm prerequisites
- You need an account with Azure AD admin permissions. Ideally use an account with the Application administrator or Global administrator role.
- Know whether the integration should access:
- SharePoint sites (team shared repositories).
- Users’ OneDrive documents.
- Both. (Permissions differ; confirm scope up front.)
- Decide whether the integration authenticates on behalf of each end user (delegated access) or through a background service (application access). Most deployments use application permissions so Sasha can index content without user interaction.
2. Sign in to Azure portal
- Open https://portal.azure.com/ in a browser and sign in with your admin account.
- Once the Azure home page loads, confirm the correct tenant is selected (upper-right corner).
3. Register the application
- In the left navigation, search for Azure Active Directory and open it.
- Click App registrations.
- Click New registration.
- Fill in:
- Name:
Sasha Microsoft 365 Connector(pick something that reflects the integration). - Supported account types: choose Accounts in this organizational directory only (Single tenant) unless you explicitly need to access other tenants.
- Redirect URI: Select Web and enter the callback URL your engineering team provides. ( Placeholder:
https://studio.yourdomain.com/api/oauth2/microsoft/callback– request confirmation from engineering before saving.)
- Name:
- Click Register.
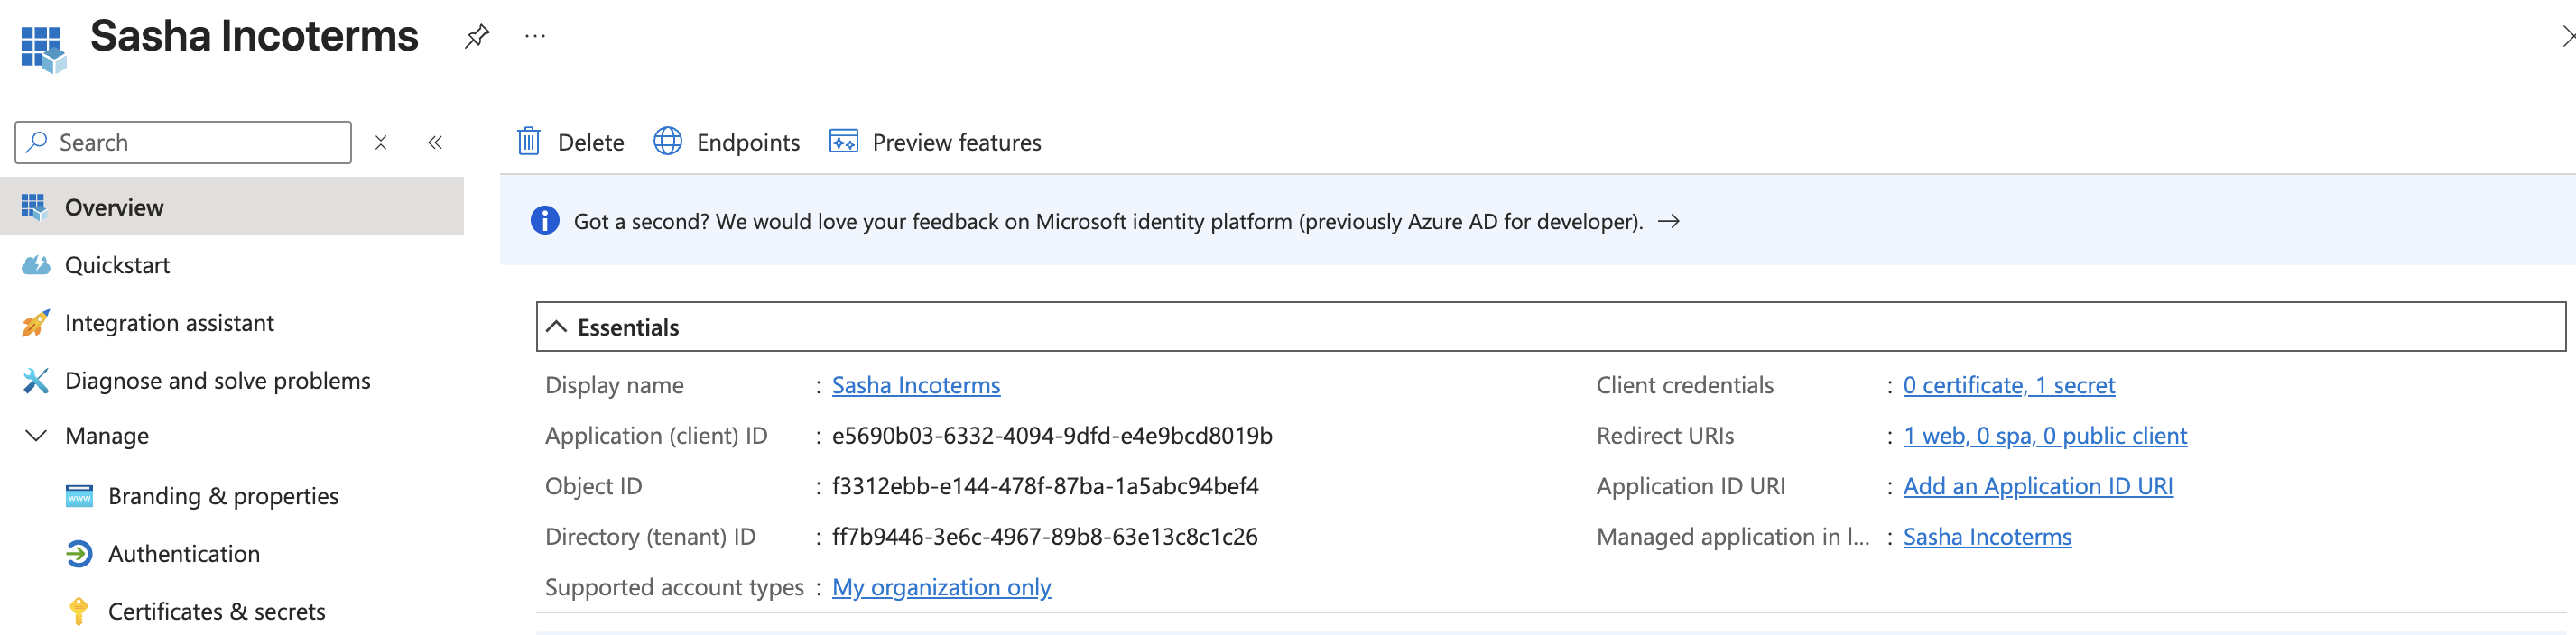
- Copy the Application (client) ID and Directory (tenant) ID displayed on the overview page; store them securely and share with engineering later.
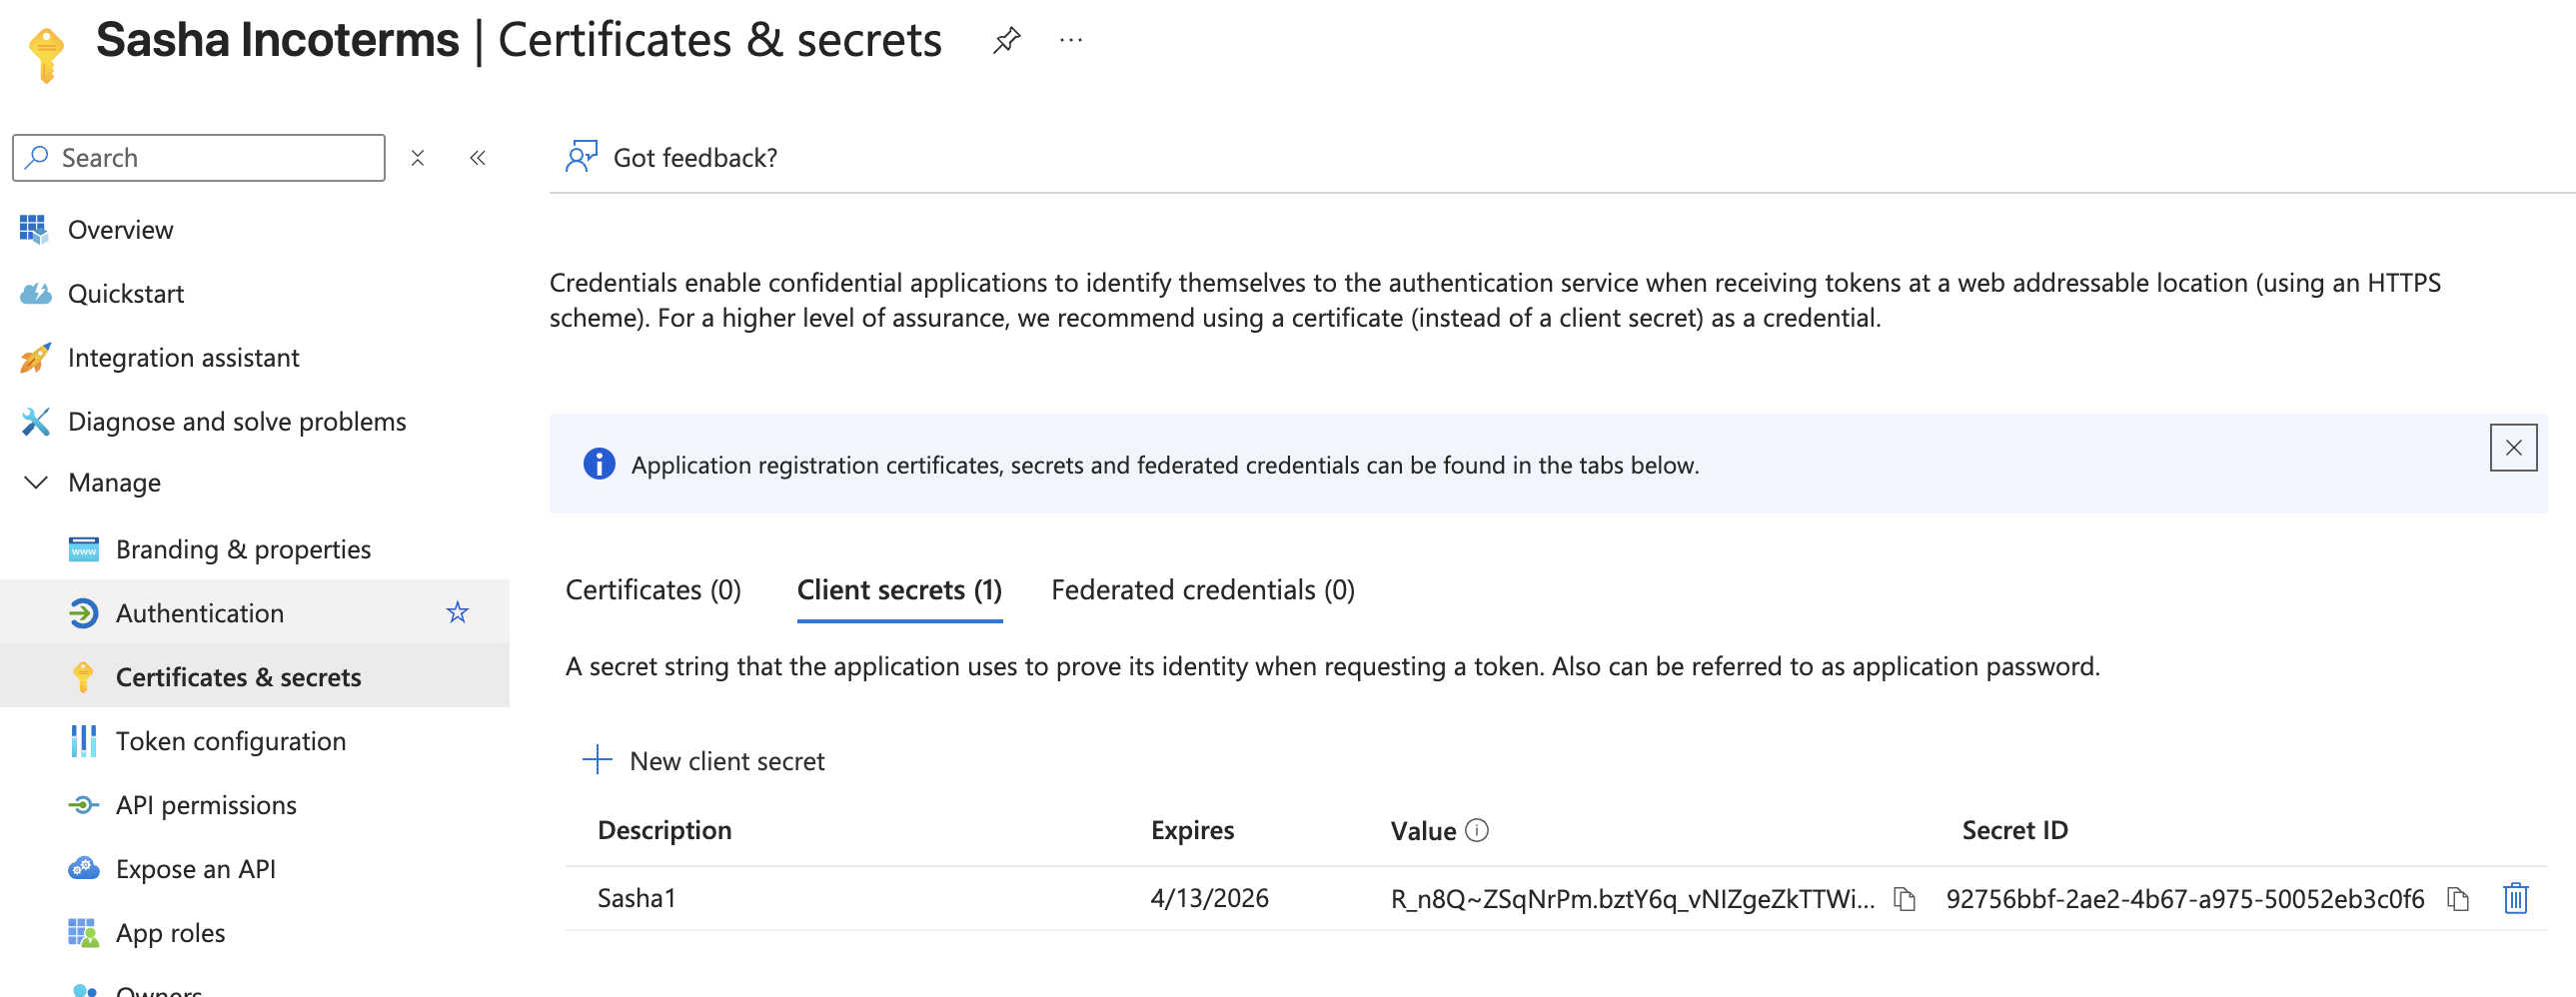
4. Create a client secret (application key)
- In the app registration, navigate to Certificates & secrets.
- Under Client secrets, click New client secret.
- Provide a description (e.g.
Sasha M365 secret) and pick an expiration that aligns with security policy (12 months is common). - Click Add.
- Immediately copy the Value field. You cannot retrieve it later.
- Store the secret in your approved secrets manager and communicate it to engineering through a secure channel (never email plaintext secrets).
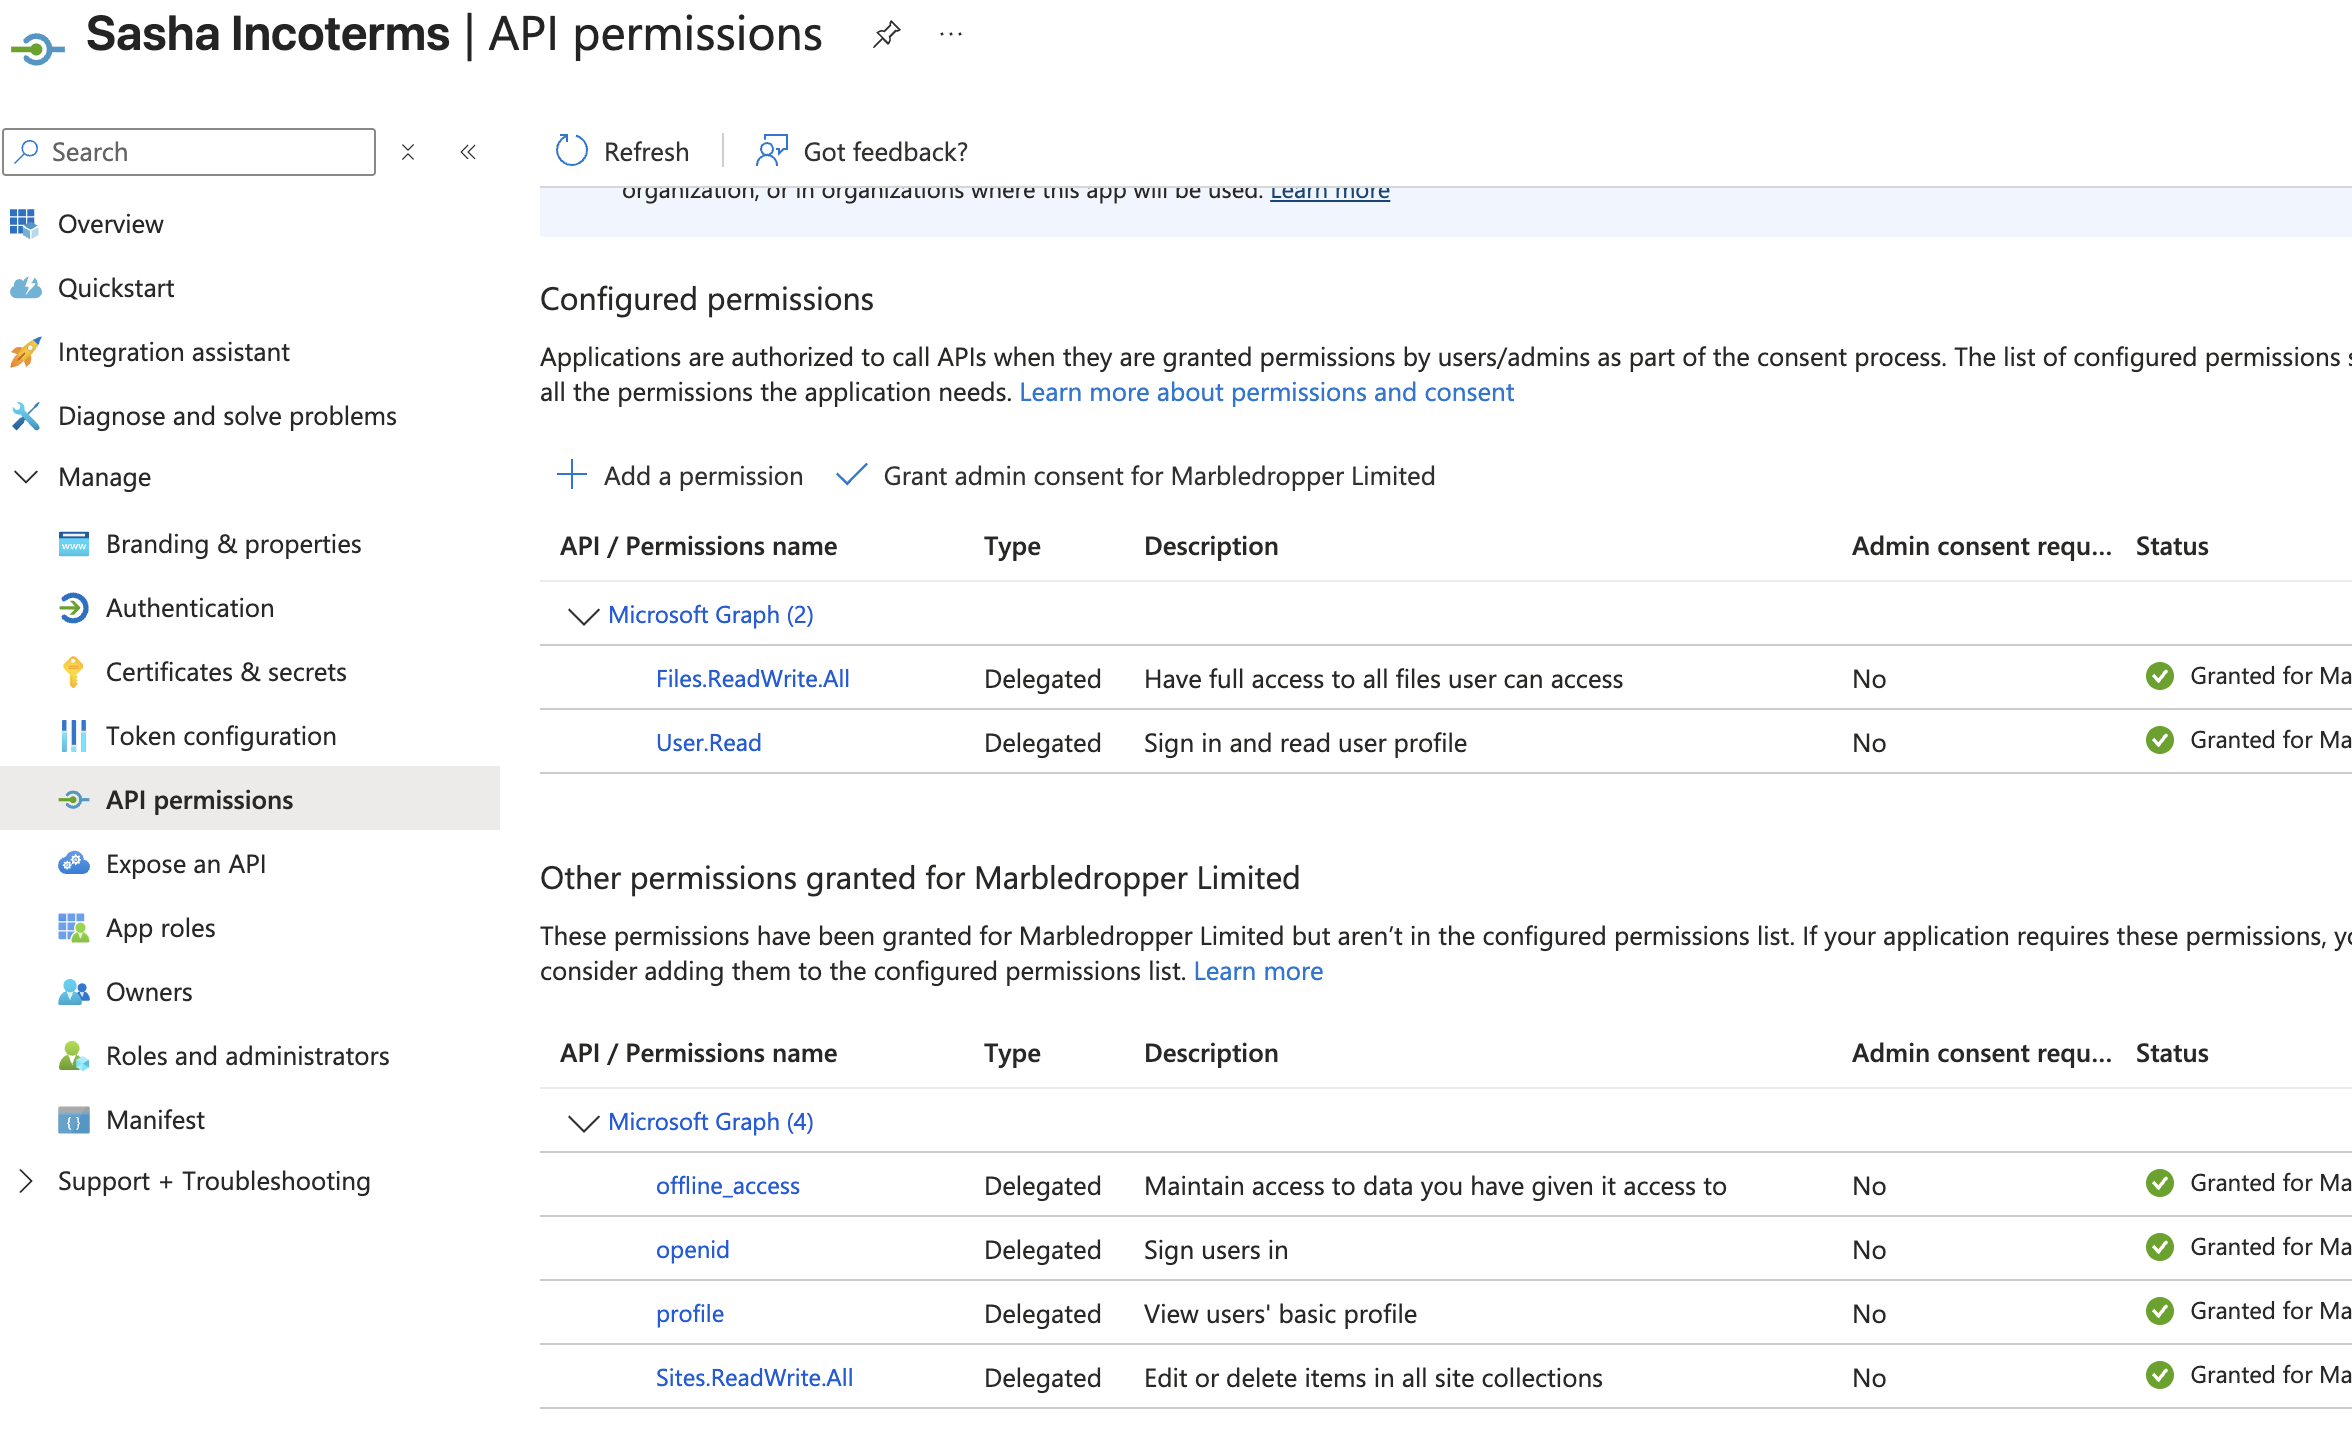
5. Configure API permissions
- Still within the app registration, open API permissions.
- Click Add a permission → Microsoft Graph.
- Choose the permission type:
- For delegated (user-on-behalf) access: select Delegated permissions.
- For background access typical in indexing scenarios: select Application permissions.
- Add the following scopes depending on requirements:
- Files.Read.All – read all files a signed-in user can access (delegated).
- Sites.Read.All – read SharePoint site collections.
- Files.ReadWrite.All or Sites.ReadWrite.All if the integration needs to upload or modify files (only grant if required).
- User.Read.All or Directory.Read.All if the app must resolve user profiles or search sites by group membership.
- Note: pick the minimum set and write down what you granted so engineering can tailor the integration.
- Click Add permissions.
- Because these are high-privilege permissions, click Grant admin consent for
. Confirm in the dialog. This step authorizes the app for the whole tenant.
6. (Optional) Restrict access to specific SharePoint sites
Azure currently treats Graph application permissions as tenant-wide. If security policy requires limiting to specific sites, you need to configure Site Collection App Catalogs or granular permissions. This is advanced; flag for engineering/security to advise. (Assumption: Sasha expects tenant-wide read access for now.)
7. Configure SharePoint application access (if using application permissions)
- Open SharePoint Admin Center: https://admin.microsoft.com/sharepoint.
- In the left menu, click Advanced → API access.
- If you see pending permission requests from the Graph scopes above, approve them. (In many tenants, the Azure admin consent already covers this; if nothing appears, no action needed.)
8. Grant site-level permissions (if required)
- For delegated access, make sure the user accounts that will sign in have at least Read permission on the sites and libraries Sasha needs.
- For application access:
- Still in the SharePoint Admin Center, go to Sites → Active sites.
- Open each target site, click Permissions → Manage additional administrators, and add the Azure AD app ID using the “App ID” option (requires PowerShell if the UI does not expose it). (Assumption: Many tenants skip this because Graph app permissions already grant access; confirm with engineering/security.)
9. Share configuration with engineering
- Send the following through your approved secure channel:
- Azure AD Tenant ID.
- Application Client ID.
- Client secret (value copied earlier).
- Confirmed list of Graph permissions granted.
- The Redirect URI you configured.
- Any site-specific restrictions or special accounts to test.
10. Validate in staging
- Engineering deploys the credentials to the staging environment.
- Log into the Sasha staging site and run the “Connect Microsoft 365” flow.
- When prompted to sign in with Microsoft, use an account that has access to the target content.
- Approve the consent dialog (it should list the scopes added above).
- Verify that SharePoint document libraries and/or OneDrive files appear in the File Tree.
- If the consent dialog claims admin approval is required, verify that Grant admin consent succeeded in Azure.
11. Production rollout checklist
- Store the client secret in your production secrets manager; rotate it according to policy (set reminders ahead of expiration).
- Ensure production Shared Drives / SharePoint sites grant access to the application or service account.
- Document the integration in your internal runbook, including who owns the Azure AD application.
- Review permissions quarterly to confirm they’re still accurate; revoke unused scopes.
Unverified assumptions (needs engineering confirmation):
- Default redirect URI for Sasha Microsoft integration is
https://studio.yourdomain.com/api/oauth2/microsoft/callback. Confirm the exact path with engineering. - Sasha currently expects tenant-wide read access via Microsoft Graph application permissions. If the product supports site-scoped permissions, update the guide.*** End Patch